How to Setup L2TP VPN on Windows 8.1
b.VPN offers its users six simultaneous VPN connections. Therefore, if you would like to use b.VPN service on six devices at the same time, you can use b.VPN application on three devices and manually configure L2TP VPN connection on other three devices. The following steps show you how to setup L2TP VPN on Windows 8.1.
Important Notes:
*Click the link below to view a list of available L2TP VPN servers and the matching "Shared Key".
https://www.bvpn.com/en/accounts/profile/l2tp_server_list/
*Your username and password are your registered e-mail address and password on b.VPN.
*You have to be a paid user in order to use L2TP VPN connection.
Follow these steps to setup L2TP VPN on Windows 8.1:
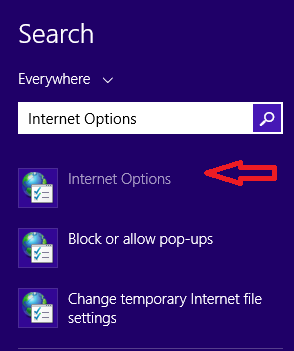
Move the cursor to the top or the bottom of the screen, click on “Search”. Type “Internet Options” in the Search box.
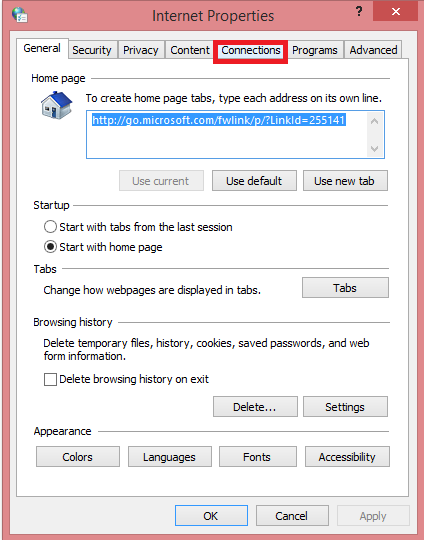
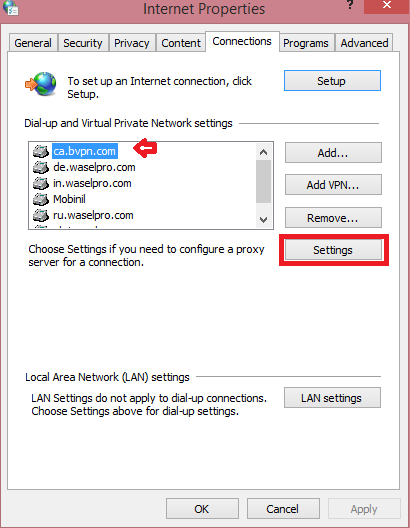
Open the “Connections” tab.
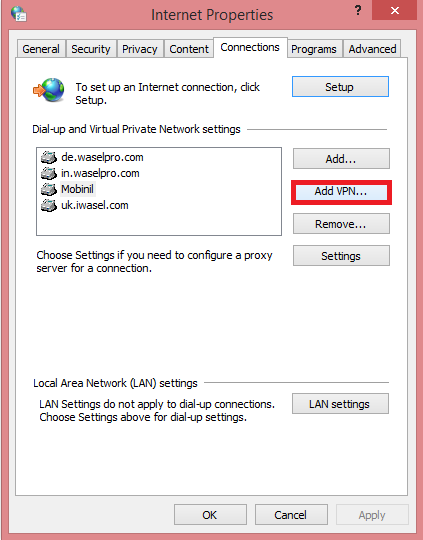
Choose “Add VPN”.
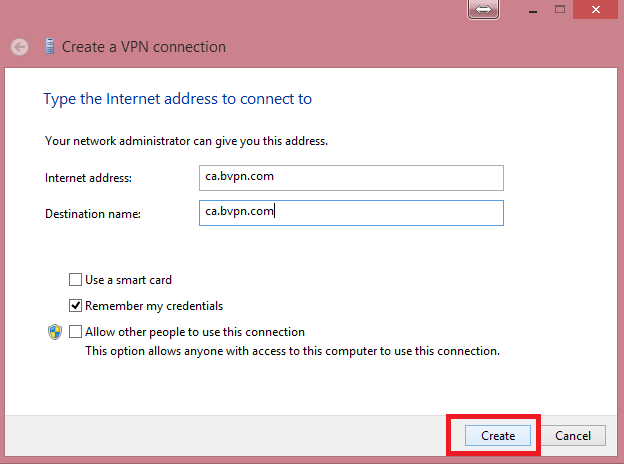
Enter the VPN Server name in the “Internet Address” box. (e.g. ca.usa.bvpn.com).
Enter a name in the “Destination Name” box. (It is recommended that you use the server address for the destination name as well).
Click “Create”.
Choose the newly created VPN connection from “Connections” and click on “Settings”.
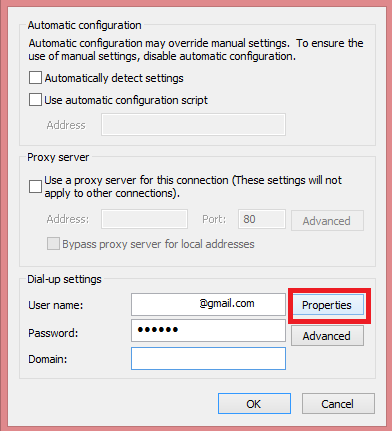
Enter your Username and Password, then Click on “Properties”.
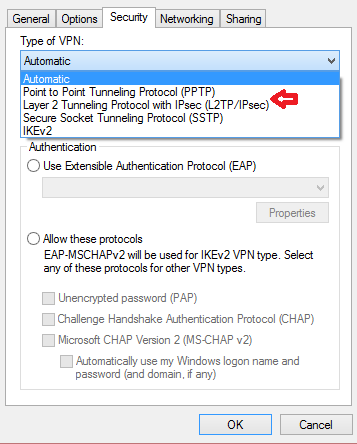
Open “Security”.
For “Type of VPN” select "Layer 2 Tunneling Protocol with IPsec (L2TP/IPsec)".
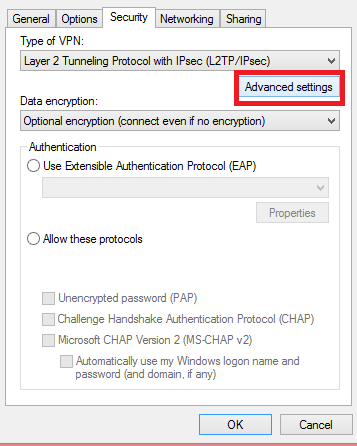
Click on “Advanced Settings”.
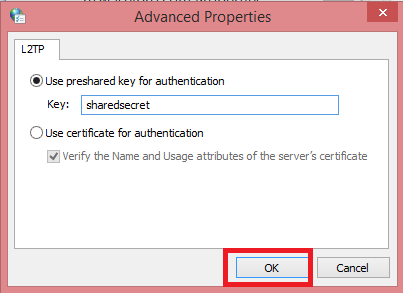
Select "Use preshared key for authentication" radio button, then enter (oorg5y8ajugiwgc) in the “Key” box.
Click "OK".
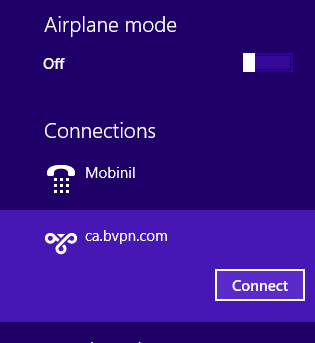
Move the cursor to the top or bottom of the screen to connect and click on “Network”.
![]()
Choose the VPN connection you have just created and click on “Connect”.
Enter you username and password, and click “OK”.
You have successfully configured L2TP VPN connection on Windows 8.1.